IELTS swap-shop at the ELTC

IELTS! image taken from en.wikipedia.org via google search for images licensed for commercial reuse with modification

There are a number of us teaching IELTS afternoon classes at the ELTC this term, so I thought it would be a good idea for us to share ideas to use in IELTS classes. With the help of the TD team at the ELTC, this was duly organised and took place on Wednesday 11th October. I kicked off by sharing a couple of my go-to activities and then everybody else followed suit.

I also promised to provide a written record of the workshop, for everybody to use as reference. Therefore, this post is a write-up of all the ideas that emerged, both for my colleagues to refer back to and for anyone else out there blessed with IELTS classes to dip into, divided up by skill to make it more user friendly.

Writing

1.

I’ll start with mine! Nothing spectacular but it worked well with my group…

Aim:

To encourage students to look at their feedback carefully rather than burying it in their bags never to be seen again. To create the need for students to ask when they don’t understand an element of the feedback (rather than ignoring it), hopefully rendering future feedback, presented similarly, more useful.

Procedure:

After writing feedback on a set of Part 1 or Part 2s, as part of the marking process, T makes a checklist based on common errors the students have made. Save this for later.

In class, group students in 3s or 4s, hand out the pieces of writing and have them look at their feedback. They should use the feedback to make a group checklist of things to remember next time they do a similar piece of writing. (To do this successfully, they need to understand their feedback. T monitors and provides further explanation when needed.) When students have finished, regroup them so that each new group contains one student from each of the previous groups. They should compare their checklists and add any extra items. T hands out the pre-prepared checklist for students to compare with their own (or in my case, as marking time was short and I hadn’t quite got round to typing up the checklist, I put it on Google classroom the next morning for the students to access at home!).

2.

Aim:

Familiarise students with the writing marking criteria and help them become better aware of their strengths and weaknesses in relation to these.

Procedure:

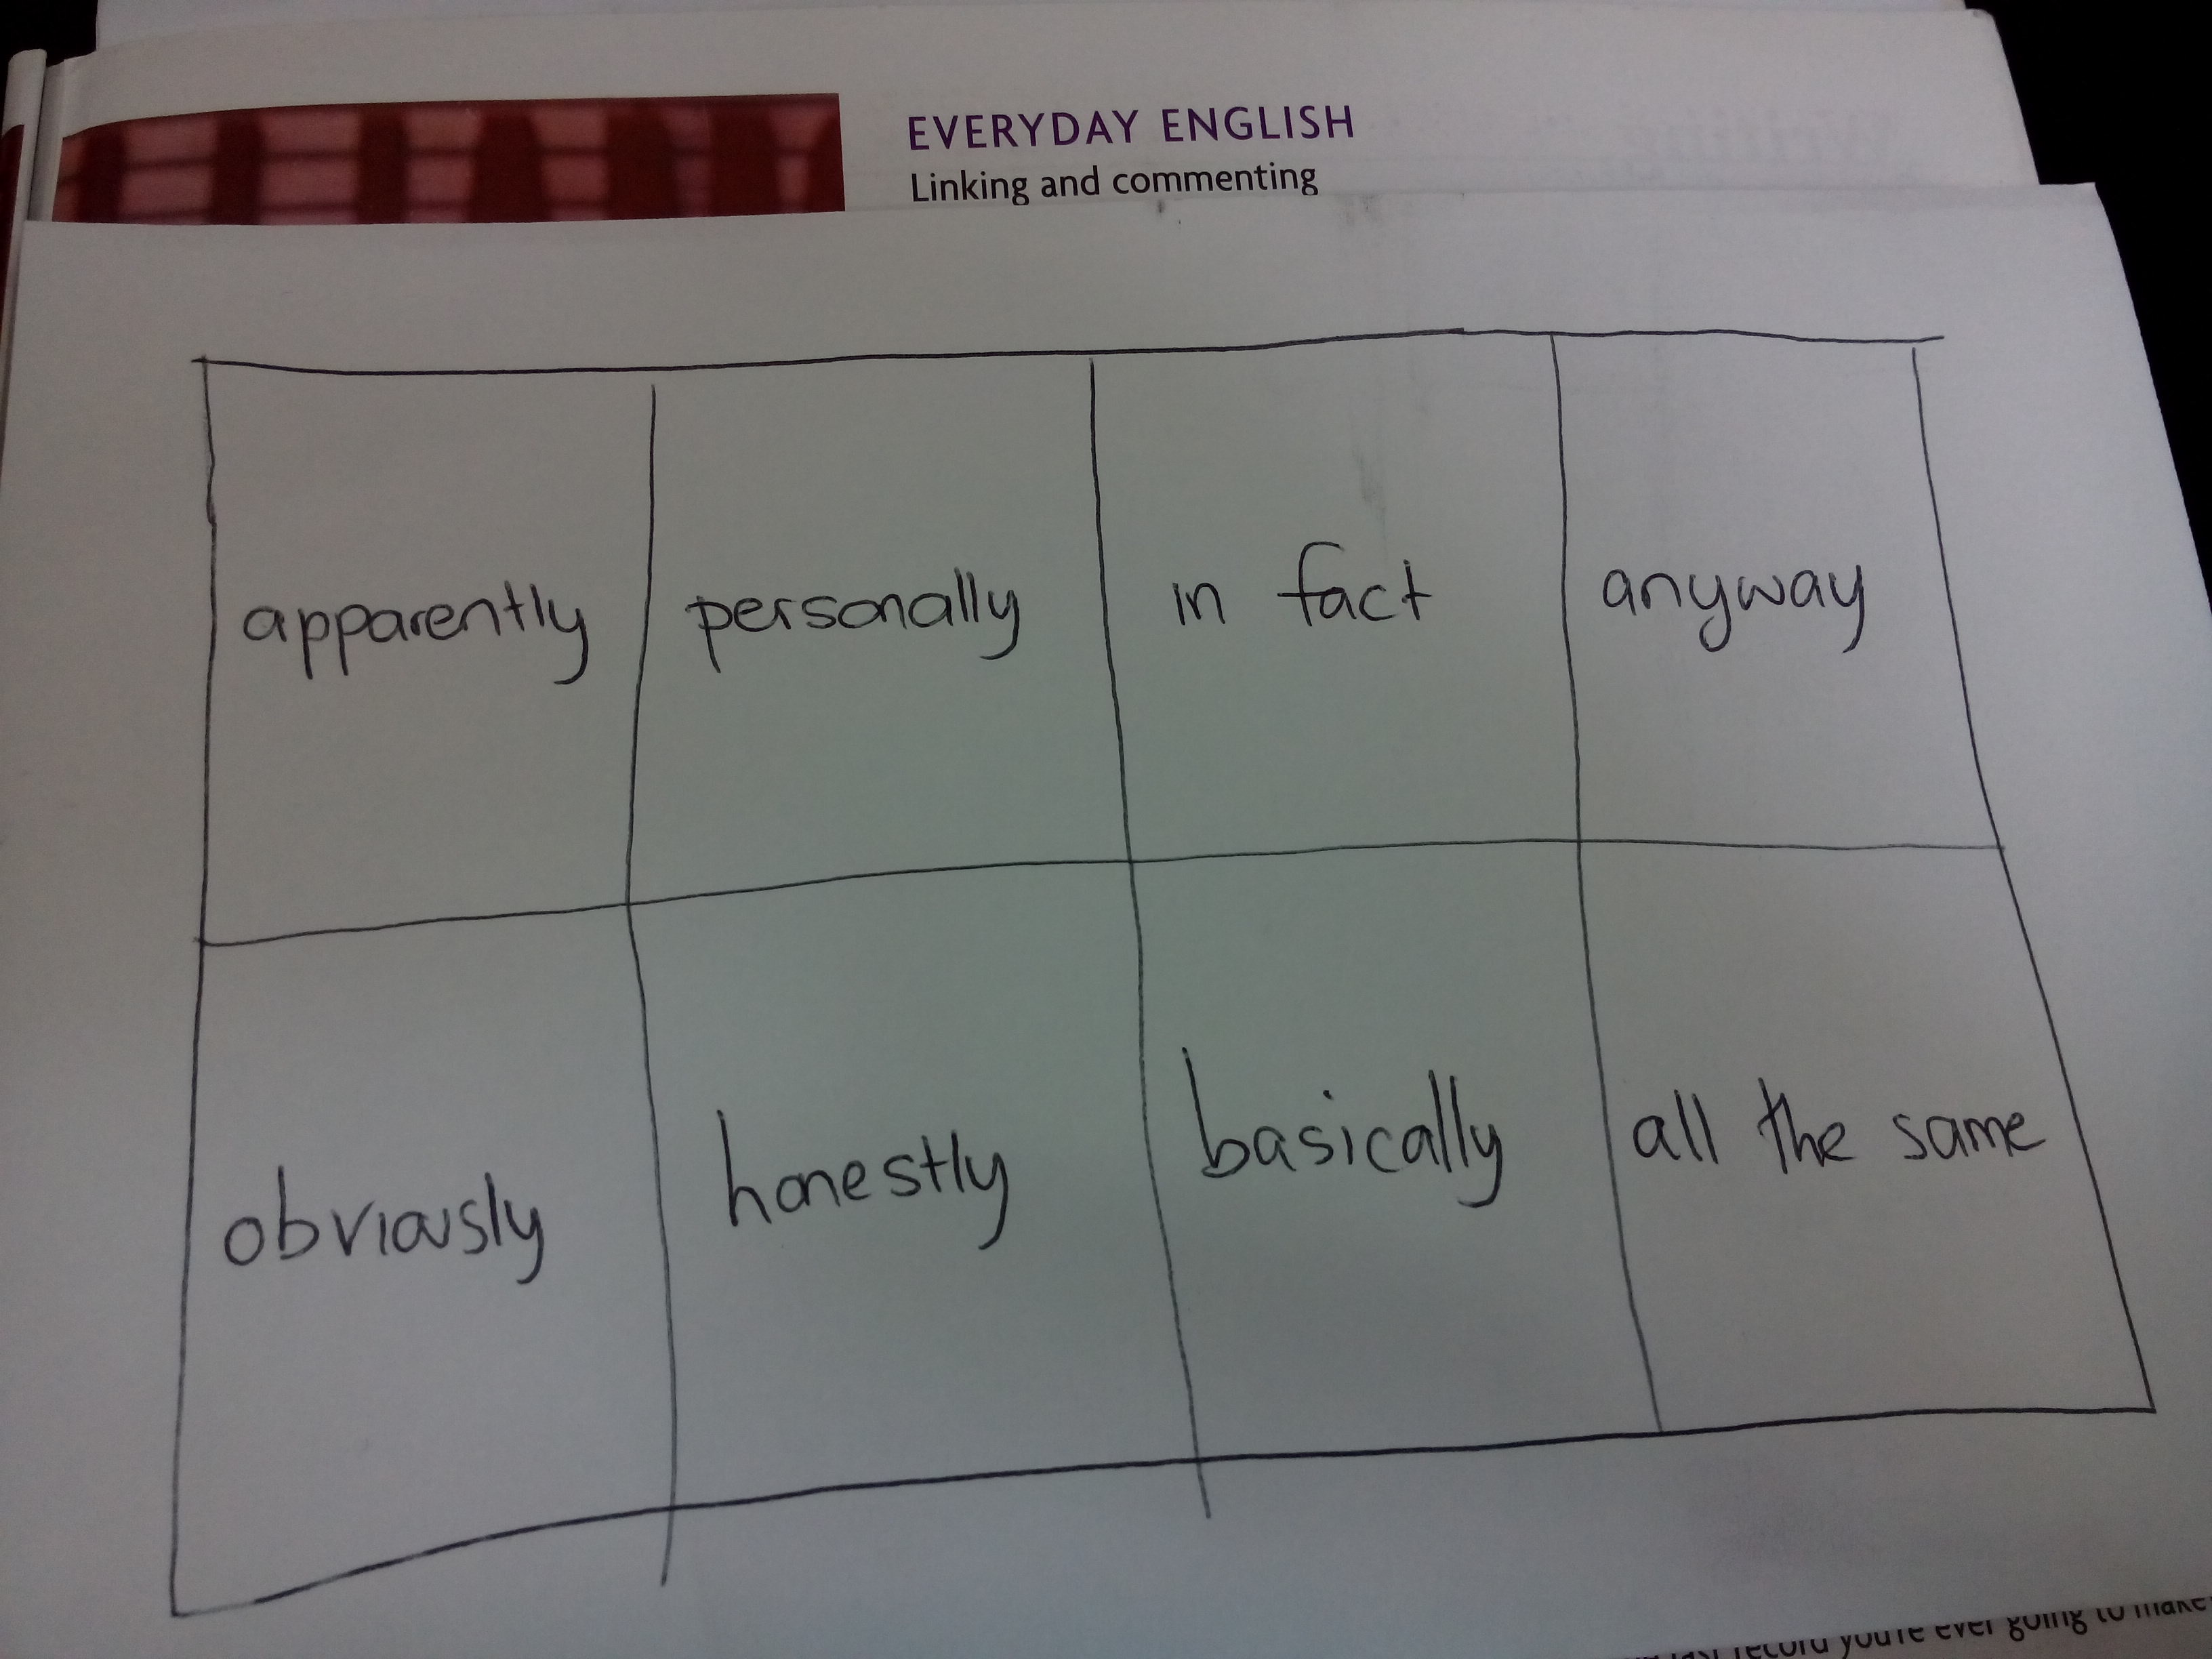
Give students a handout with some sample feedback comments together with the marking criteria headings (see example below). In groups, students look at the sample comments and decide together which of the criteria they affect.

They can then look at a piece of writing you have given them feedback on and categorise your comments in a similar way. In doing this, they can see which criteria they have most/least positive/negative feedback within and thereby see where their strengths and weaknesses lie.

3.

Aim:

Encourage students to focus on paragraph construction/organisation.

Procedure:

Put students in groups and give them a part 2 question to brainstorm ideas for. Give each person in the group a topic sentence for a possible paragraph for that essay question. They add the next sentence and pass it on. This continues for a few sentences until the paragraph is complete. In order to add their sentence, the students have to read the paragraph carefully and understand where it is going. They will also have to look at the language used carefully, in order to use rich lexical chains rather than repeating a particular word over and over across sentences.

Once the activity is finished, stick the paragraphs up around the room then get students to walk round in pairs to look at and analyse them. (You can give them/elicit a checklist of things to look for). On the basis of this, they decide which paragraph is best and why. You could then ask them to look at a paragraph of their own from a previously marked piece of writing and analyse it in a similar fashion.

4.

Aim: 

Get students using chart/graph language for part 1 and give students practice in understanding what is happening in such visuals.

Procedure:

Students draw a chart or graph but don’t label it. T redistributes the charts so that each student has another student’s chart or graph. They they then have to analyse it, decide what is going on and create the labels. The charts/graphs are redistributed again and this time students have to pick out 3 features and write about them in part 1 fashion. Once finished, the charts/graphs and accompanying paragraphs can be stuck on the wall for students to walk round, analyse (elicit what criteria they should use first, of course) and rank.

Speaking

For speaking, I brought along a print out of my Part 2 Speaking Game , which aims to encourage students to speak for a full two minutes, and my colleagues brought the following:

1. 

Aim:

Develop fluency and use of vocabulary (using the game “Just a minute”)

Procedure: 

Give the students this handout/similar to familiarise students with the game and elicit the rules:

Once they have understood the goal and rules, brainstorm a list of IELTS-style topics. The students then use these to play “Just a minute”. The repetition factor applies only to content words/ideas.

Variation:

Rather than having students interrupt the speaker for the repetition/hesitation, the speaker is encouraged to speak for a minute uninterrupted and, at the end of the game, the other two students in the group score him/her based on how much/little repetition/hesitation there was.

2. 

Aim:

Work on expanding responses to IELTS speaking questions

Procedure:

Brainstorm and write on the board as many IELTS topics as your class can think of between them. Students then mingle, find a partner and ask that partner a question about one of the topics on the board. The response should be well-developed but the student who asked the question should also ask follow-up questions to encourage further expansion. Before they start, tell students that they will have to report back a few interesting things they find out, to encourage them to listen carefully too. You might also like to model expansion, to give students a clear target. T monitors and does delayed feedback on the end, commenting on expansion, use of vocabulary etc not just grammatical errors.

3.

Aim:

Develop fluency in speaking

Procedure:

Prepare sets of cards, with one IELTS speaking topic per card. Students pick a card and have to speak about the topic for a minute. Then next time, they have to speak for a minute and a half. Then two minutes. This helps them to build up the length of time they can speak for. The topics can be broad e.g. “holidays” or you can make it harder by making the topic more specific or restricting the time frame.

4.

Aim:

Work on planning/preparation for speaking part 2

Procedure: 

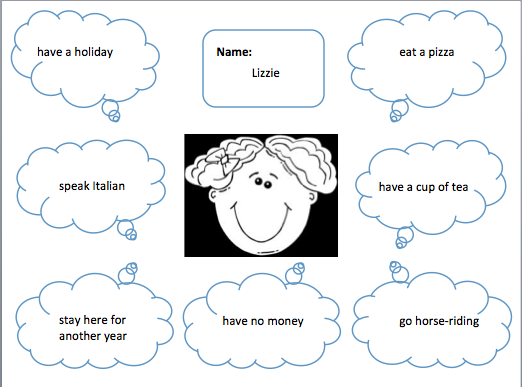
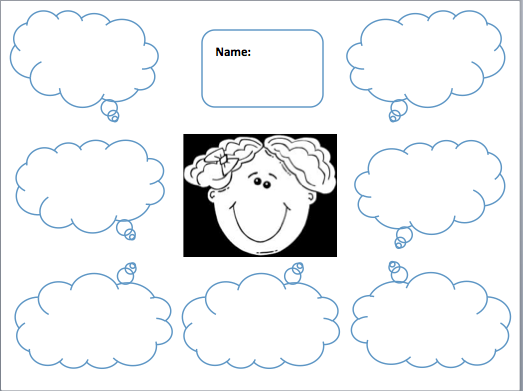
For homework, students choose an image that relates in some way to whichever topic you have been looking at in class. They should also prepare some notes that will help them speak about that image. Restrict the size of the paper they can use, to something of the size that they will get for an IELTS part 2 speaking exam task. In class, everybody uploads their pictures to Google classroom, in order to project them for everybody to see, and then students take it in turns to stand up at the front of the class, and use their notes to speak about the image.

I then made the suggestion that students organise their speaking part 2 note paper as follows:

The idea is that in the pressure of the moment, when they glance down at their notes while speaking, it will be easier for them to keep track of whether they  have spoken about all the required elements. Credit to my ex-DOS Jonny Ingham, an IELTS speaking examiner,  from whom I got this idea while teaching IELTS at IHPA! He said the students who use the note-making time effectively always out-perform those who don’t, as the response tends to be better organised and clearer.)

Reading/Listening/Vocabulary

1.

Aim:

Develop the skill of matching paragraphs to headings.

Procedure:

Give each pair of students one paragraph between 2 from an IELTS reading text. (Depending on how big your class is and how many paragraphs the text has, you may have more than one pair with the same paragraph. This doesn’t matter.) Students look at their paragraph, discuss it together, and write down a few key words that sum it up. Only once they have done this do you then distribute a list of the headings, one of which belongs to their paragraph. Using their key words, and looking again at their paragraph, they decide which heading is theirs. They must agree and be able to prove their answer to the class i.e. be able to explain how the heading corresponds with the content/vocabulary of their paragraph.

Variation:

Instead of giving students a paragraph, give out just the topic sentences of each of the paragraphs and the list of headings. Again, they must work together and decide which heading goes with the topic sentence they have by noticing how the words in the topic sentence correspond (positively or negatively) to the words in the headings.

2. 

Aim: 

Encourage students to identify the wrong answers in a reading or listening, as a way to help them identify the right answer.

Procedure:

Students work together to look at a multiple choice question/it’s possible answers and see which wrong answers they can identify by using the text. “It can’t be c) because it says x while in the text it says y” With listening, this can be done whole class by (re)playing short sections of text in order for students to focus on one question at a time.

Variation: Before playing a listening text, have students look at the questions/possible answers and have them discuss what they would expect to hear if each of the choices were the correct answer. They should think about different ways of expressing the answers.

3.

Aim:

Expand students’ vocabulary

Procedure:

Every time you use a text in class, follow up reading skills work by getting students to call out any words they found difficult and boarding them. They then need to do some word work – find synonyms and opposites, word families, useful expressions etc. Get them to keep a notebook where they can group vocabulary by topic.

Variation:

After looking at a text, tell students that they need to know all the vocabulary in it as you will test them on a random selection of words from it in the next lesson. If they don’t know any words in it, they will need to go away, find out what the words mean and learn them.

4. 

Aim: 

Develop students’ awareness of collocation

Procedure:

Before a listening lesson, look at the transcript of the listening text and pick out up to eight good collocations (you don’t want to overdo it!). After students have done the listening exercises that go with the text, dictate the first half of each collocation for students to write down. Play the listening again and students should listen in order to write down the second half of each collocation. Once they have got them all, get students to use the collocations by making sentences/asking and answering questions etc. Draw attention to any cases where they should be avoided in writing (e.g. if they are too informal).

Resource recommendations

Two particular books were mentioned as go-to books:

1. 

IELTS Resource Pack 

Has lots of useful speaking (also a good resource simply of [almost] endless speaking topics if you are at a loss) and lots writing activities that encourage interaction.

I would have mentioned it if one of my colleagues hadn’t. One of my favourite activities involves students looking at two part 2 essays, both of which contain a mixture of good and bad sentences, and identifying which are the good so that they finish with one good part 2 essay. There are also some good part 1 writing activities.
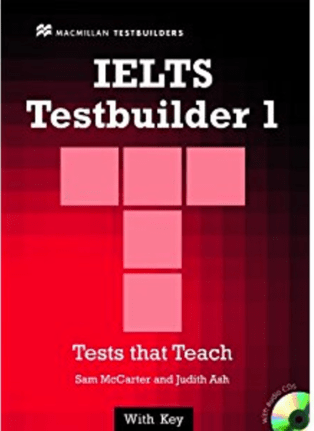
2.

IELTS Testbuilder

This has good explanations for reading texts regarding why certain answers are wrong, why the correct answers are correct etc.

Final tips…

1.

With the map questions in listening, take advantage of the box sizes – a big square won’t be a little cafe, a tiny square won’t be a shopping centre etc.

2.

Don’t forget task repetition: using speed dating/speaking ladders can facilitate task repetition within speaking activities, which will have a positive effect on fluency and complexity.

3. 

I will cheekily add: Don’t forget my Useful links for IELTS post for a wealth of IELTS-related links, and my Top 10 resources for teaching IELTS  might be of interest too.

I hope this post is useful to some of you. Do any of you have any go-to activities or resources for IELTS? If yes, please do share them by using the comments box below this post.  🙂 

(To my colleagues: if I have missed anything or got anything wrong, please let me know and I’ll make changes accordingly. Scribbling things down and then subsequently trying to decipher them may not be the most reliable method but it was all I had!)

IELTS Speaking Part 2 (Fun) Practice Activity

Each week on a Tuesday, since my IELTS courses finished, I have been doing IELTS PSP Speaking, which is basically an hour of IELTS-focused speaking practice. I have found that when practicing part 2, students frequently dry up before 2 minutes, sometimes well before, so I came up with this activity to encourage them to extend their answers as much as possible… It is a mixture of an activity that was suggested by a Sheffield Uni colleague of mine from last summer, Tim Ball, at the IELTS Swap Shop session that took place at IATEFL this year, and the well-known game, connect 4.

  • It consists of a 6×6 grid (click on the picture to access a ready-to-use document):
Screen Shot 2015-05-26 at 12.53.30

Game board

  •  In each square of the grid there is an IELTS Part 2 Speaking topic.
  • Students are aiming to score as many points as possible by getting 3 or 4 squares in a row, with 3 being worth 10 points and 4 being worth 20 points.
  • In order to “win” a square, students must speak for the full two minutes about the topic in question.
  • The instructions on the game remind students to think about the what/who/why/when/how type questions that accompany speaking part 2 topics.
  • As with the exam, they have a minute to think about what they are going to say and make a few notes.
  • Students play in pairs.
  • Student A speaks, Student B listens and times, and vice-versa.
  • Teacher listens and does delayed feedback at suitable moments.

The students were engaged by it and the aim was fulfilled: instead of just giving up after 1 and a half minutes, they did push themselves to keep speaking! (How important winning a square becomes… 😉 )

Let me know how your students get on with it! Enjoy!

Valentine’s Day Lesson Idea/plan + materials

For once in my life, I decided to break with tradition and actually do a Valentine’s Day lesson. Turned out to be quite good fun with my Upper Intermediate teens during their last lesson before Valentine’s Day…

Image from wikicommons.org licensed for commercial reuse with modification

Image from wikicommons.org licensed for commercial reuse with modification

This lesson includes a prediction quiz, a video clip, a short philosophical reading, a discussion and some project work. Materials used are all linked to at the end of this post.

  • Brief lead-in: Show slide with a Valentine’s Day picture and a picture of marmite. Ask students what these have in common. (Love it or hate it…) Which camp are they in? Why? (NB: you may want to show a quick clip of a marmite advertisement – I would if I did this lesson again! Unless students are familiar with marmite…)
  • Prediction quiz: In pairs/small groups, students complete the quiz about Valentine’s Day with their predictions.
  • Video clip: Students watch/listen and check their predictions, noting correct answers where necessary.
Click on this picture to be taken to the video clip!

Click on this picture to be taken to the video clip!

  • Check: Students check what they understood in pairs/small groups.
  • Discuss: Students discuss if they are surprised by any of the statistics and why/why not.
  • Discuss: In new groupings, students discuss the two philosophical questions that lead in to the reading.
  • Read: Students read the short text and compare the writer’s views with their ideas from the discussion.
  • Discuss: Students discuss the gist and opinion questions at the end of the text.
  • Produce: Having learnt all about Valentine’s Day, the students, as campaigners, now create their own holiday. (Who is it in honour of? Why? How is it celebrated? Encourage them to make it as zany as possible. Encourage them to incorporate the statistical language from the video clip [in the case of my teens, this recycles the statistical language they met last term]). Students should present their holiday in a poster (for my students I prompted them to use the persuasive language we’d looked at in a previous lesson, so some more review), to convince the government to give everybody a national holiday for it. I also warned them that I (the government) would be asking a few questions following the presentation, which they duly prepared for.

My teens got really in to the final production stage, getting into role as petitioners for their holiday, and they even took a photo of their finished poster afterwards! 🙂

Here are the materials I used:

And here is the holiday that won!

The 'Government' says, "Yes, please!" ;-)

The ‘Government’ says, “Yes, please!” 😉

If you use this lesson with your classes, I hope  you enjoy it! Let me know how it goes by posting in the comments… 🙂

Kaboom! The Explosive Team Review Game (With an added twist…)

I am sure most of you are already familiar with the review game of Kaboom (also known variously as Tornado, Earthquake, and any other non-context-sensitive natural disaster). In this post, I am going to share the adaptations, or tweaks, that I’ve made to it in order to:

  • cut down on preparation time
  • make it more student-centred
  • make it more challenging

The Regular Version

In the regular version, prior to heading to class, the teacher pre-prepares a grid (size decided at discretion – depends how long you want the game to take!). The grid is made of squares, to each of which is allocated one of the following:

  • A question mark – signifies, funnily enough, a question.
  • A flashing B – signifies a bonus (which means 50 free points to the recipient team)
  • The arrows of change – two arrows one above the other, each pointing in opposite directions, signifies the team changes points, either with the other team, or if more than two teams, the chosen team (which is going to be the team with the most points!)
  • A bomb – signifies an explosion of points, leaving the recipient team with zero.

The teacher also prepares a set of questions to ask.

Once in the classroom, the teacher draws a blank version of the grid on the board, with letter and number coordinates. Teams take turns to pick a square and answer a question/receive a bonus/change scores/lose all their points, depending on the square. The game continues till all squares have been revealed. The winners are the team with the highest score.

My Version

Well, it’s the same as the above version, except:

  • The teacher doesn’t prepare a grid before going to class: the teacher draws the empty grid on the board (sized at discretion) and makes up the square contents as he/she goes along. And when the kids accuse you of making it up as you go along, wow them with your amazing memory skills… 😉

This way, you save on preparation time (big deal, it’s pretty minimal, but why not!) AND you get to ham up the drama, orchestrating the changes and explosions etc. to keep it as exciting as possible.

  • The teacher doesn’t prepare a set of questions before going to class: instead, when a question square is selected, the opposing team must come up with the question. How? By working together, looking through their coursebooks/notes and coming up with one.

This way, you save on preparation time AND you wind up with a bunch of teenagers avidly looking through their books/notes either in order to make up a question or preparing themselves to be asked. Encourage them to be crafty: the harder the questions, the less likely the other team is to get points. They try really hard to come up with tricky questions and do a lot of reviewing in the process, with lots of whispered discussions regarding vocabulary definitions and grammar points, and how to make them as difficult as possible. The game becomes less teacher-centred too.

  • The teacher breaks down the question squares in to ? (free question), ?G (grammar-related question) and ?V (vocabulary-related question)

This is so that the students don’t get stuck in a question-type rut. It also serves, in this way, to up the challenge level. If your class were still not coming up with enough variety of questions, then you could throw in a few ?T (teacher-generated questions) as well! This would also enable you to draw attention to a particular language point/piece of vocabulary that you wanted to review, without having to prepare all the questions/make the game entirely teacher-centred.

Here is an example of a game in progress: 

Kaboom!

Kaboom!

This was with my upper intermediate teenagers class. They are a small class (currently) and so only two teams were necessary. Being quite high-level, they were doing well with regards to question variety so I hadn’t inflicted any ?T squares at this point. Here, you can see the different types of question squares, the bonus squares, the arrows of change and the bomb squares.

All in all, Kaboom! is a great review game. It’s easy to tweak the amount of challenge according to the level of your learners, and children, teenagers and adults all get caught up in the excitement. Finally, I may be biased, but I think it’s even better with my tweaks! 😉

Enjoy! 

An added twist! Image taken from en.wikipedia.org, licensed for commercial reuse with modification.

An added twist! Image taken from en.wikipedia.org, licensed for commercial reuse with modification.

Speaking Bingo

This idea came up in our two-weekly Friday seminar, nearly two weeks ago now (how time flies…). The seminar was about teaching teenagers, and at this point were were discussing the difference between games and adding game-like challenge, and sharing ideas for how to add game-like challenge. Our YL coordinator suggested Speaking Bingo.

Aim:

Encourage learners to incorporate target language into their speaking. Give learners additional motivation to speak.

Procedure:

  • Prior to a speaking activity, have students make up a bingo card for themselves. In each square they choose a piece of vocabulary studied in that lesson (or from a set studied previously that you wanted to review).
  • During the speaking activity, students tick off each bit of vocabulary as they use it.
  • First student to tick off all the bits of vocabulary gets to call Bingo!

Variation:

Instead of ticking off the words they use themselves, you could get them to start a timer and tick off any target language their partner uses. Their partner should be trying to use as much target language as possible, and the winner would be the one who managed to use all the language on their partner’s card (which they wouldn’t have previously seen) in the fastest time.

Bingo with L9

An example I made for my Level 9s (Upper Intermediate)

It worked really well with my adult Level 9’s, gave them that added push to use the target language and they enjoyed it!

60 seconds: a simple vocabulary review game

So, at our school, it’s that ‘nearly time for the final test’ kind of time, but as any self-respecting teacher will tell you, review (especially of the spaced variety) is an important part of language learning. So hopefully this activity will be useful to you, at whatever point in your courses you may be! The amount of preparation required for this game ranges from minimal to none…

Goal: 

Encourage active recall of previously studied vocabulary; push learners to think about the co-text of vocabulary not just the basic meaning.

Level: 

Pre-intermediate upwards. For lower levels, give them more time to come up with examples, and perhaps provide a sample example on the card to get them going. It kind of grades itself by the vocabulary used. Each level will be capable of putting different words into example sentences, each level’s sentences will vary in complexity.

Materials: 

Small pieces of paper, each with a piece of target vocabulary on one side. (You can prepare these yourself [minimal] or get your learners to do it in groups, which case you only need to provide paper! [none] )

Procedure:

  • Put learners into groups of four. Within the four, each learner has a partner and two opponents.
  • Give each group a set of cards (or if your students made the cards, get each group to swap their pack of cards with another group)
  • Each student takes it in turn to pick a card and think of example sentences into which that word could fit. They tell their group as many sentences as they can in sixty seconds, substituting ‘banana’ or similar for the target word.
  • If their partner guesses the word first, they as a pair get a point. If one of the other pair guess the word first, they as a pair get the point.
  • The game continues until you want to stop it or until all cards are finished.
  • If you use a vocabulary box/bag, you could get them to put the words that weren’t guessed into it, for future review. You could also play this game using vocabulary from the box/bag.

Benefits:

Learners, whether providing examples or guessing the target word, have to think about various aspects of the word in question, not only the meaning. I.e. They need to think about the word grammar, about collocates, about register etc. I think this makes it more useful than simply describing/defining the word.

Variations:

If the focus is something like word pairs (which I have needed to review with my Level 9/Upper Intermediate learners), you could provide only half of the word pair on the pieces of paper, so that the learner who is providing the example sentences has to recall what the full word pair is, as well as how to use it.

Enjoy!

60 seconds...starting now! Image taken from en.wikipedia.org, licensed for commercial re-use with modification

60 seconds…starting now!              Image taken from en.wikipedia.org, licensed for commercial re-use with modification

British Council Videos: ‘Teacher Talk’

One of the perks of being a British Council Associate is that as well as having had the opportunity to deliver a webinar (with another on the cards for next year!) I have also been able to participate in a project called ‘Teacher Talk‘. This is a series of videos edited by the British Council, which feature some of the BCAs talking about various ELT-related issues.

So far, you can watch short video clips about:

(Click on the title to be taken to the relevant video – I think there may be more forthcoming, but I can’t actually remember at this stage how many topics there were in all!)

I think part of the beauty of these clips is that they are so short – within a few minutes you can either pick up a few new ideas or remind yourself of things you knew but hadn’t been uppermost in your mind recently, becoming buried amongst the myriad other things that we, as teachers, have to juggle.

The other thing I like about them is that you hear a range of voices on a single subject, particularly as the British Council has edited the videos very cleverly, so that although they cut from one person to another, the flow of ideas is seamless and easy to follow.

From my own selfish developmental point of view, making the videos, which I sent to the British Council to be included in the editing process, encouraged me to reflect on and synthesise (very succinctly by my standards – the videos had to be fairly brief!)  my views on these various important elements of ELT. Watching the videos now, months down the line, it encourages me to question whether I practice what I (and the others in the video clips) ‘preach’ and how I could try and do so more effectively.

All in all, a very rewarding project to have been part of. Thank you, British Council, for this fantastic opportunity! 🙂

Verb patterns, curiosity and pre-intermediate learners

This is an activity I did with my pre-intermediate learners today, to give them extra opportunity to use the verb patterns that we had looked at in their previous lesson, in a more personalised way. It doesn’t require much preparation, as it mostly draws on learner-generated content – as well as their natural curiosity! What it does require is lots of use of the verb patterns in question, including questions and, potentially, third-person structures.

Time:

+- 40 minutes (could have run for longer but 40 minutes was sufficient)

Materials:

One teacher-made model:

Screen Shot 2014-04-10 at 10.58.03

image of “me” taken from openclipart.org via Google search for images licensed for commercial reuse with modification; bubbles from powerpoint shapes!

One learner handout:

Screen Shot 2014-04-10 at 10.58.13

Here is the power point that I made with both (so that the teacher one can be adapted and projected/printed, while the learner one can be printed…)

 Language focus:

Verb patterns – specifically:

  • I want to – infinitive
  • I’d love to – infinitive
  • I enjoy – verb-ing
  • I’m fed up with – verb-ing
  • I hope to – infinitive
  • I’m thinking of – verb-ing
  • I’m looking forward to -verb-ing. 

[although adaptable to whichever verb patterns you’ve been looking at which can be personalised…]

 Procedure:

  • Elicit the target verb patterns (that you have looked at in the previous lesson) and board them (if using projection, then in an area of the the board that is not used by the projector screen!) in categories according to pattern.
  • Either project, or hand out printouts of, your teacher model.
  • Put the learners in pairs and get them to look at the model.
  • Tell them these are your answers to the sentence stems given by the verb patterns.
  • Get them to ask you questions in order to guess which stem/pattern each answer/thought cloud corresponds with. (The answers are bare infinitives so there are no linguistic clues and learners have to put the answers into the correct form according to the verb pattern).
  • Encourage them to find out more about the answer once they have guessed correctly:

E.g. :

Learners: Do you enjoy speaking Italian?

Teacher: Yes but there’s something I enjoy more! Guess again!

Learners: Do you enjoy going horse-riding?

Teacher: Yes, I do! Very much!

Learners: Do you do it here? Where do you go? etc

  • Once they have finished guessing and quizzing you, hand out the blank student handout for learners to complete with their own ideas.
  • Put them in pairs (get them to work with a new partner)
  • Ask them to take turns asking questions (and finding out more about their partner’s thought clouds once they have guessed correctly) until they have correctly guessed all of the clouds.
  • Monitor and collect feedback for a delayed feedback slot.

Optional extra:

  • Regroup the learners so that each new group consists of either person A or person B of each of the AB pairs from the previous activity.
  • Ask learners to tell their new group what they’ve learnt about their partner, using the verb patterns.

(I did this with one of my pre-int classes today – the one that had already had progress test feedback because they’d done their tests promptly, and therefore didn’t need class time allocating to that today – following the delayed feedback slot from part one of the activity, and it gave them a chance to act on the feedback I’d given.)