
You know when you learn something and you wish you had known it sooner? Microsoft Word has made me feel that way on more than one occasion. Here are a couple of things I wish I had known well before I actually wound up learning them:
1. ‘Split screen’ function
In first place by a long way, I give you the ‘Split screen‘ function. ‘Split screen‘ really is nothing short of magical. I (like to) forget how much time I have spent scrolling up and down between various parts of a document to add things in, to make changes to things before I discovered it was possible with the mere click or two of a button to split the document and half so that I could keep one bit still and move the other bit!
How?
In Word for Apple, you click on “Window” in the tool bar and select “Split” – simple as that! In the version for Windows, you will find “Split” nestled in the “View” tab.

Mac
When you click it, the magic happens:

You can drag the bar up and down to make one or the other portions bigger, as you need to.
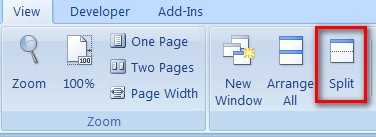
Windows sufferers
When?
I’ve found it useful (read: a Godsend!) in the following situations:
- Materials writing: when editing a document containing both teachers notes and a student hand-out. It is much easier to make sure that teachers’ notes and student hand-outs correspond correctly if you can see both at once. You also save a lot of time by not scrolling up and down the document between the two!
- Materials writing: when editing a document containing both student activities/tasks and answer keys. You can add the answers as you go, again with no scrolling required, and actually SEE the tasks as you write the answers rather than try to memorise/go back and check/repeat.
- Academic writing: adding references as you go is much easier if you can have the reference section right there to add to as you use new references in the main body of the document. Again, no tedious scrolling required! (This becomes increasingly beneficial, the longer your document grows!)
Right-click shortcuts
How
When you right-click anywhere on your document, a list of options appear:
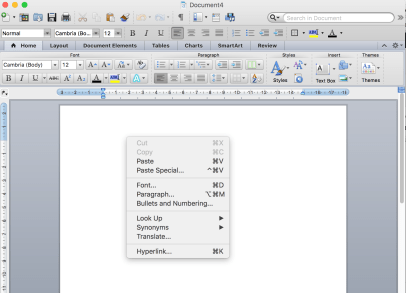
Hopefully you won’t need the Cut/Copy/Paste options as you will be using ctrl/cmd + X/C/V respectively, but if you prefer using the mouse, then there they are to use – just do your right-click over the portion of text you have just highlighted to move around (rather than moving your mouse All The Way to Edit!)
The Font/Paragraph/Bullets and Numbering options I think are a bit redundant given they are right there in the Home tab above the document (in both Apple and Windows versions).
The hyperlink option, however, is quite useful for inserting links quickly. (Alternatively you have to go to Insert and then scroll down to the bottom of a long list to “hyperlink”)
I like the synonyms option – if you highlight a word in your text, and right-click then select synonyms, Word will, funnily enough, show you some synonyms of that word. Could be useful for those times when you are lacking in inspiration…
There is also a dictionary option and a translator option that you can use if you can’t be bothered to open a web browser and go to a web-based tool!
When
When you want to do things more quickly!
Keyboard shortcuts
How
So, remember I explained at great length how to find the “Split” option? Well, rather than go clicking around to do it, you could also use a keyboard shortcut. The default one on the Mac version is cmd+alt+s
How do you know what all the keyboard shortcuts are? (Other than cut/copy/paste which everyone knows!) Well, in the Apple version, quite a few of them are helpfully listed alongside their function within the menu bar drop-down menus:

If you take against one of the shortcuts assigned, or you want to add a shortcut for something else, you can change it by going to Tools -> Customise Keyboard:

All the potential commands are listed by category, and where there is a shortcut you will be told what it is in the Current keys. In the above example, for Insert Symbol there isn’t a shortcut so I am assigning one by making the shortcut while the cursor is in the Press new keyboard shortcut box. Once I click Assign, it will move into the Current keys box. Now when I press Command+Option+Shift+S, I will be able to insert a symbol! Don’t worry, if the shortcut you choose is already assigned to something else, you will be told next to where it says “Currently assigned to”. As you can see, my new shortcut is as yet unused. (I had to try a couple of options before I found this one!)
Shortcut keys are your friend – learn the shortcuts for the things you do most often, and if there isn’t a shortcut key, add one! (This link tells you how to do it for Windows versions)
When
The sooner the better! Make Word work for you, rather than the other way round.

Styles are my favourite thing – ready made formatting for headings and subheadings..
I also like find and replace – really useful for navigating through a document or batch-changing headings or terminology.
Oooh yes “Find and replace” has served me well for mass-replacing ‘learner’ with ‘student’ because that’s what was wanted! 🙂 I feel like I need to get to know ‘styles’ better – not done so yet…
I know that you’ve already done your Delta 😉 but the links in section 3 of this post should help you to find out more about styles and various other useful Word functions: https://sandymillin.wordpress.com/2013/07/31/preparing-for-the-delta/
Related to split screen, another useful option is being able to have multiple documents open in the same screen, if you don’t have multiple desktops enabled or need to switch between two things a lot. On Apple, this is found under Window>Arrange All.
Good luck with learning more about styles!
Sandy
Discovering ‘format painter’ has made life a lot easier
Hello Jonny. Dare I confess to not knowing about that?! 😉
Pingback: IATEFL 2016 Online: Enhancing writing and speaking outcomes using Google Apps (Joe Dale) – Lizzie Pinard
Pingback: Preparing for the Delta | Sandy Millin