
After I did my learner autonomy workshop in November, I was invited to repeat it as part of the ELTC Training Day which took place on Thursday 14th January this year. I didn’t need asking twice to be part of this exciting programme of sessions – so duly organised my holiday to be back from visiting family and horse in time to participate! The day didn’t, of course, disappoint. There were two parallel sessions running throughout the day with a tech-focused block and a development-focused block in the morning and again in the afternoon. (I gather the lunch provided in between these two sets of session blocks was rather good, though I did the packed lunch thing which is always easier when you’re vegan :-p )
As all the sessions were really useful, I thought I’d share my notes/take-away from each of the ones I attended…
Smartboard Extras
Do you have Smartboards at your school/centre? We have. And with Smartboards comes the responsibility of a) knowing how to use the thing properly and b) using it in a principled manner in your lessons!
It turns out that the newer versions of Smartboard (Version 15.1 onwards) have some additional interactive functions built in, that allow for student participation using mobile devices. Much of it is geared towards school children *but* one of our tech gurus, Nick, identified and shared with us a couple of features that lend themselves to use in the ELT classroom.
The first of these is the ability to post things to the board. This can be text or images (pre-selected by the teacher depending on requirement) and the board can be open or divided into categories (again, pre-set by teacher).
Basically, to set this game up, the teacher selects the “Lab” button, which is in the toolbar of Smartboard and looks like a Top-hat that a magician would use, and chooses to add an activity of “Shout it out” which is mobile-enabled. The default setting is “categorised” board and you can either switch that to open board or keep “categorised” so that in the next step you will then set the category titles. You can have up to four categories. You also need to choose the type of contribution (i.e. text or images) and the maximum number of contributions per device. 3 is the default but you decide and change accordingly. NB: one device could mean one student, a pair of students or a group of students, depending how you want to run the game/your goals. You could then add a timer or buzzer if you felt it necessary (bearing in mind that timing out doesn’t stop the game and stopping the game doesn’t stop the time! It’s not that fully integrated yet…) and load the game.
You will have a dialogue box and if it is the first activity you do on a day with a group, there will be as yet no contributors. If you do a second activity, the contributors remain loaded, but can be added to. When you click on “start activity” a code is generated and students must input the code into http://www.classlab.com. They will have a screen that requires the code and a username. This username will be associated with a symbol and that will appear next to all their contributions on the board. (NB you may want to turn off the screen while the students do the activity to stop them seeing each other’s contributions, if it is a competitive activity!)
It is useful to cue your computer to the point of the dialogue box being open and the code being generated (so clicking on “start activity” after which you can pause it) before class starts, as it takes quite a while to load fully. You can hide the dialogue box by clicking on the “activity” button, and clicking again reveals it again.
Suggestions for use include but are not limited to revision of vocabulary and academic language e.g. linkers. (One of my challenges to myself is to come up with different ways of using this with my latest group of students who I started teaching yesterday evening, so watch this space for related blog posts! Likewise the picture activity that follows… )
You can use the same activity “Shout it out” for picture sharing. In this case, the set up is the same but you select images rather than text as the contribution type and use ‘arranged randomly’ rather than setting categories (a setting that could also be useful for brainstorming vocabulary, for example, if you use text rather than images!). Again, a code is generated, which the students enter into http://www.classlab.com.
Smartboard also has the capacity to enable teachers to create quizzes and questionnaires. This works in a similar way to google forms but with the added advantage of students being able to respond live in the class, using their devices, alone or in pairs/groups while the teacher can control the time spent per slide or per activity as a whole. It also enables you to view/display graphics showing answers chosen by participants.
A final tip we were given was in use of the pens. You know how when you write on the Smartboard and it looks like a five year old could have done better? Well, if you choose “Text Pen” which is under the pen function, when you write on the board it automatically converts into text! According to Nick it’s pretty accurate even with his writing, and you do have the option to select “x” if it gets it wrong, and that will revert it to handwriting again. Or you can select the tick and edit it, if you prefer.
Ideas for doing a TD session
This was the other TD block session I went to other than my own, and it too gave some food for thought. The TD programme at the ELTC is very teacher-led – the TD team are teachers (as vs. managers) and of course the scholarship circles are teacher-managed too. There seems to be one and often more than one workshop in any given week, with various focuses. Teachers are always encouraged to give workshops (as part of their own development) and attendance isn’t compulsory. Of course, teachers are expected to log 3hrs a week of scholarship time, and workshops can be useful to this end.
Anyway, this session was aimed at teachers who are interested in delivering workshops and we looked at:
- reasons for attending a workshop
- reasons for giving a workshop
- different delivery formats
- things to keep in mind when preparing a workshop
Reasons for attending included: to support a colleague, to help log scholarship time, to see what others are doing in the classroom, to share ideas, to learn/increase knowledge and skills, amongst others. Reasons for giving included: to help log scholarship time (!), a way of developing yourself, sharing research, sharing ideas and getting feedback on them, feeding back after attending a conference, amongst others.
We looked at different delivery formats and suitability to different scenarios, so talks, presentations, workshops, panel discussions, structured discussions and unstructured discussions, and also agreed that within a single session there may be elements of multiple formats.
Things to keep in mind in preparing a workshop included: knowing your audience (and possible mismatch between their and your aims), knowing the context (e.g. here, it’s not compulsory and teachers are therefore there by choice but that doesn’t mean they aren’t tired at the end of a long week etc.), choosing a suitable format with maximum possibility of engagement, not being OTT (we watched a brief youtube clip parodying a TD session!), amongst other things.
It was an interesting session and I made a few minor changes to the delivery of my session (which was in the afternoon TD block of sessions) based on what I had picked up.
Tech Timesavers
This was one of those sessions that was a whirlwind of little tech things that make you go “ooooh I wish I had known that before!!”
Our main browser on the centre computers is Firefox, so the first thing we looked at was some handy add-ons:

- “Reader” enables you to extract articles (except from BBC) without all the ads and links, so that when you open it in Word, you start with a much cleaner piece of text.
- “Clippings” is a clipper tool that enables you to reuse chunks of text. So, first you create them (think of and input phrases that you commonly use in giving feedback or report writing – I think this would be super for my colleagues at IHPA during report writing, for instance!) and then you can drag it into any browser window or programme for reuse.
We were also shown how to set the options so that: downloaded files are always saved to a specific location (rather than in some hard to find temporary folder somewhere!) – by clicking on the three horizontal lines, going to options and under general selecting “always ask me where to save files”. The browser will then remember the first location you pick for the rest of your browsing session, which is handy!
Finally, we learnt how to save things to the toolbar by selecting “bookmark this page” and changing the option in the drop-down menu to “toolbar” and THEN how to create folders in the toolbar. So Nick has an ELTC folder with things like the portal link in it.
We then moved on from Firefox to other things…
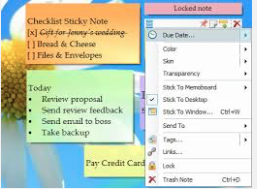
- Sticky notes – my notes for this read “(like Mac!)” … I’ve had my current laptop for nearly five years now and I remember when I first got it, Stickies opened automatically. So I’ve been using it since then. It is basically a programme that enables you to have post-it notes on your desktop screen, in a choice of colours. So you could colour code for priority, for instances. Turns out this programme also exists on PCs! Little did I know… It’s pretty basic in terms of use, you just add new sticky, write what you need to remember on it and drag it to where you want it to be on your desktop. You can also resize them according to need, and, as I mentioned, select the colour, as well as setting a due date (must check how to do this on Mac!). One of the teachers mentioned that when she initially started to use it, she needed a real post-it on her real desk to remind her to look at the electronic ones on the computer desktop! 🙂 So maybe it takes some getting used to. Good though. One thing to remember if you use a “managed desktop” : the stickies only open on the first computer you log into. So, for instance, if you got in and went to your classroom to set the computer up, the stickies would appear on there. If you then went to your office and loaded up that computer, the stickies wouldn’t then appear on there too. So, you need to make sure you first access the computer you want the stickies to show on!

- Google Keep – this is available to anybody who has a Google account. So, when you are in your email, you go to those nine squares in the top righthand corner of your screen, and click on “more” as many times as you can, including “even more from Google” and in “Home and Office” you will see Google Keep waiting for you. There is also an app for it that you can download onto mobile devices, so you can use it “on the move”. Basically, it’s a lot like Evernote but free. If I didn’t already use Evernote, then I would use Google Keep. The concept is great. An electronic organiser that lets you do most things you could think of – write notes to yourself and keep them in different notebooks, of course, but also saving pdfs/links etc., making checklists that you can tick off, speaking into it for it to convert to text etc. You can colour code notes and add labels (like tags in blog world!) that make the notes more easily searchable, like an index system. And you can share notes.
Next we looked at a couple of things that Google Drive allows you to do:
- Convert a photograph of a .pdf file into text – take a photograph or screenshot (saved as a .jpeg) of a pdf and save it in your drive. In the options (three vertical dots), open it as a google doc and ta-dah! It doesn’t, however, pick up on italics or reproduce diagrams/images.
- Voice to text: This only works when using Google docs in Google Chrome browser, apparently. You go to ‘tools’ and select voice typing. You will get a pop-up message asking you to allow use of your microphone and then you are away. Say stuff and it will appear on screen. It also converts punctuation – e.g. if you say fullstop it types a “.” and so on. “New paragraph” and “new line” also have the desired effect. You can imagine the potential of using this with students when creating dialogues etc…
Finally we looked at a few more general things:

- Web Corp: A corpus tool that bases its analysis on up-to-date web data. You can specify exactly what it looks at using the advanced options. (E.g. newspapers, which type of newspapers etc.) You can also generate a wordlist for a text that you input (by link or by copy-paste) that ranks words by how often they appear in that text. This could help you decide what language to focus on before teaching a text, for example.
- Lynda.com: This is NOT free. However, Sheffield University has some kind of licensing agreement with it, so teachers can access it for free, except not me because I am an associate not a teacher apparently! Anyway, if you work for a university, or big institution, could be worth checking if your place has such an agreement and therefore you have free access. It is basically a collection of tutorial videos on everything under the sun, indexed. Would have liked to have had a proper gander but who knows, hopefully one day!
- Youtube playlists: Unlisted playlists are a good way of collecting videos and sharing them with students. When you find a video you want to share with a class of students, click on “add to” to add it to a playlist. You can then create a new playlist, which you would probably name after your group of students (for ease of identification for you!) and set it as “unlisted”. This means that it won’t appear in search engines but that anybody with the correct link can access it. You copy and paste aforementioned link into whichever platform you use with students (e.g. Edmodo, Google Classroom etc.) in a static location, so that they can easily access it.
At this point we sadly ran out of time and the whirlwind of techy stuff tour came to an end! And you can imagine, at this point I had to directly change classrooms, set up my workshop and deliver it! My poor little brain…
Learner Autonomy
So, my Learner Autonomy workshop was in the last slot of the day (save the Tech Q and A and TD Q and A drop-in sessions, where you could ask the TD team and the tech team any questions – I, for example, asked for a re-run of the questionnaire/quiz thing in Smartboard as I had missed the crucial bit of information for how to access it!), with all that had gone before being a tough act to follow. It seemed to go well enough though, with teachers doing their best to push their tired brains just a little bit longer in order to participate. I enjoyed delivering it, but then I am an LA geek, can never get enough of talking about LA and motivation, and, all-importantly, hearing what others have to say about it too. 🙂 For example, one of the teachers told us about his successful reading project, which sounded really good. In fact, hmm, wonder if I could elicit a guest post…
And that was the training day! Lots of useful stuff to kick start the new term and year with, which I look forward to implementing/using…
Hope some of it is of use/interest to you too!
